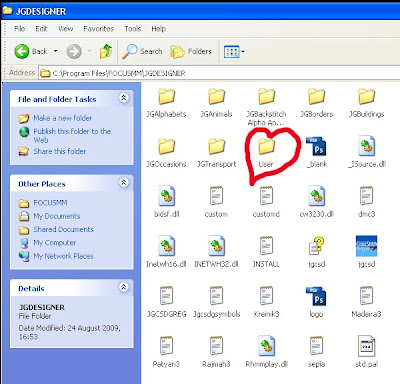
The first thing you can do today is to step out from behind the anonymous mask of User and insert something of your own identity into the software - it is yours, after all. On your computer find and click on the following folder: C:\Program Files\FOCUSMM\JGDESIGNER. In this folder you will see another folder called User. Click on the name of this folder twice (not on the folder itself which will open the folder) and you will see that you are able to edit this file name. You can now change it to whatever name pleases you. I have changed mine to Jacqueline's_Motifs so you can see. Here is a tip - if you would like to find your folder quickly in the motif library list (which you saw yesterday) then you need to do something to ensure your folder is at the very top or the very bottom of the list, and not hidden in the middle somewhere - and as we progress, you will find that you can add even more folders, so having them all together is a bonus. Either prefix your folder with a letter before J in the alphabet - or - go through the other folders and rename them all by prefixing the JG with Z - or ZZ if your parents gifted you with the name Zyna.
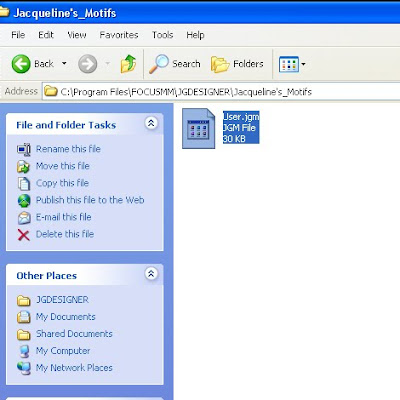
When you have renamed the folder, double click on the folder itself to open it and you will find a file inside called....User....well, you know what to do with that now, don't you? You can give this file any name you want. However, when you have experimented with that, pause to reflect how you might start to organize the motif collections which will be coming through soon. Maybe you have purchased all the Ackworth School Quaker Motifs and you might want to file some of them away in the motif library. So, might it be a good idea to have a file called something like Quaker? Maybe you would like to separate Quaker motifs from Quaker alphabets, in which case you need two files. How do you do that when this is a propriety file format and you cannot access it directly? Let me tell you how you can work round this with a few clicks and in no time at all you will have created 20 files for yourself, at least (otherwise you are not trying hard enough!).First we need to set up an empty file which you can use as a template file to create as many new files as you ever will want, when you want them. So right click on the file called User (or formerly called User) to copy it, now go up one level so that you can see the JG folders, click on the folder called JGTransport to open it (it doesn't have to be this folder, it could be any of the others).
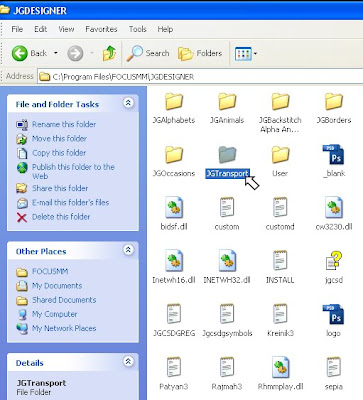
Paste the file you have copied here.
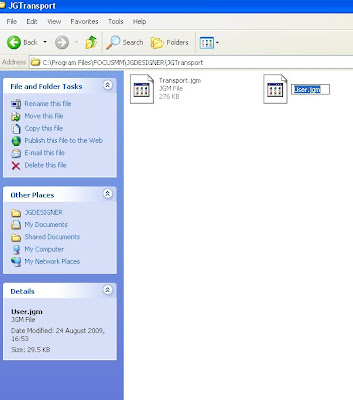
Now rename it New_Motif_File, right-click on it and select Copy, go back to your folder and open it, then paste the file into your folder.
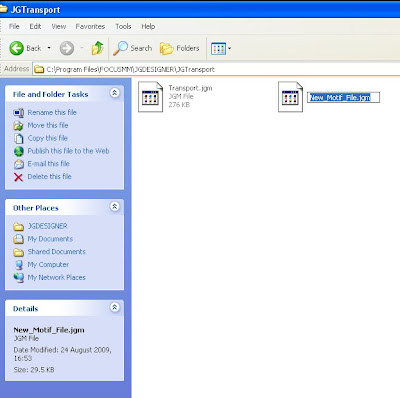
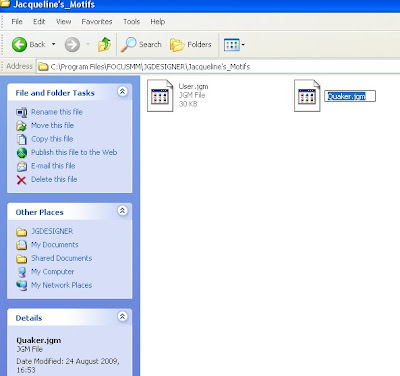
Now rename the file to whatever you want. You can keep on going just by pasting and renaming to heart's content now. Don't worry if you find you haven't chosen the most apt names this time round, it is easy enough to rename your files when you see how exactly you will be using them.
Now create new folders for yourself by using the Windows Tool Bar and choose File>New>Folder.
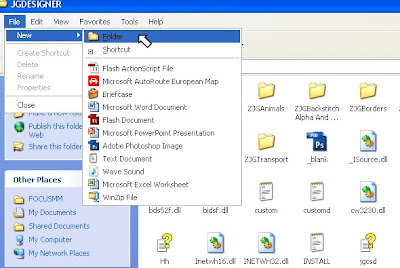
Name one of your folders Motif_File_Template_Folder and paste a New_Motif_File in there. You will only use this file for setting up new files and you will be able to find it more easily in the future than by trying to remember which JG file you stored your template in. In fact, now you have created this template folder, you can go back to JGTransport and tidy up after yourself by deleting the New_Motif_File from there. Isn't it great to be in control! Tomorrow we shall start to pop some motifs in the files you have created today.



No comments:
Post a Comment